Maple Syrup Time in Wisconsin!
By: Beth Lanham
Do you have cabin fever after our COLD winter? You might want to consider tapping your Maple trees soon! Did you know that Wisconsin is the 3rd largest producer of maple syrup and maple products among US states?
I am an amateur, as this will only be my 3rd year tapping my maple trees. I’m happy to share what I have learned and hope that others will consider tapping and/or offer their expertise!
Historical Perspective:
While the exact origins of maple tapping are unknown, the practice is well documented among the Indigenous peoples of North America, who used simple tools and natural materials to collect sap. European settlers adopted and refined these methods in the 17th century, using hand‑carved wooden spouts inserted into small holes drilled into mature sugar maples. Sap was gathered in wooden buckets or birch bark containers. By the early 1800s, maple sugaring had grown into a commercial activity across New England, and the 19th century brought further efficiencies with improved spouts and more effective evaporation techniques.
What is sap?
Sap is a liquid that circulates through the tree, carrying water and essential nutrients from the roots to the branches and leaves. It plays a large role in the growth and functions of the tree. Responsible tapping does not harm a healthy tree, but it’s important to move the tap hole each year and it doesn’t hurt to give the tree a break every so often to support long‑term health.
Which trees to tap?
Sugar Maples are the gold standard for collecting and making maple syrup. Its sap has the highest sugar content - typically around 2-3% - and produces a rich maple flavor. The higher sugar content translates into less boiling time, although it takes approximately 40 gallons of sap to boil down to 1 gallon of maple syrup! Sugar Maples also tend to produce the highest volume of sap and maintain flow the longest during the ideal freeze–thaw cycles of late winter.
One of my Sugar Maple’s put out as much as 5 gallons/day last winter, while others seemed to produce maybe a cup a day!
The main tradeoff with the Sugar Maple is its slow growth rate. It can take decades to reach a tappable size of 10-12 inches in diameter. Planting Sugar Maples is not a quick path to syrup production, but they are beautiful, long-lived hardwoods that add value over time!

Photo by Kapil Viswanathan on Unsplash
The Black Maple tree is a close second to the Sugar Maple for tree sap! It is closely related to the Sugar Maple and it’s sap sugar content is thought to be similar at 1-2%. Black Maples also need to reach the 10-12” diameter mark for tapping.
The Red Maple produces sap with an average sugar content of approximately 1.7%, which makes a very tasty syrup! However, Red Maples generally yield less sap than either Black or Sugar Maples.
The Silver Maple is not ideal for tapping, but it can be tapped. This variety tends to have a more watery or thinner sap and a lower sugar content which generally leads to more boiling time.
There are other varieties of maple trees, however the above seem to be the most common varieties for maple syrup in the upper Midwest!
When to tap your trees:
The best time to tap trees is in late winter/early spring, when the nights are below freezing and the days are above freezing. This freeze–thaw cycle creates the pressure that makes sap flow.
Two years ago, this time frame seemed to only last for a week or two, however, last year, I was able to keep tapping for 3-4 weeks!
Does Tapping Hurt Your Trees?
No, trees are resilient! While drilling a small hole does make a wound, a mature maple is easily able to repair it and can therefore recover while you capture their maple syrup! The tap hole should be about 2” deep and less than 0.5” wide…to a mature Maple tree, this is a very small wound!
How to tap your trees:
The diameter of the tree should be at least 10-12” for tapping. Place the tapping hole at least 3 feet from the bottom of the tree and stay at least 6” from any previous sap collection spots. South‑facing taps may run earlier on sunny days, but any side of the tree works, ideally beneath a large branch. (I have had success when the tap was placed on the east side of the tree.) Generally, place one tap per tree, unless the tree is very large in diameter.
Taps can be purchased at a variety of hardware or online stores. I have seen both plastic and metal taps though I prefer metal taps to avoid breakage when pounding them into the tree! Drill the hole with a bit that is the approximate size of the tap, usually 7/16 or 5/16. Drill the hole about 2” deep and when you have cleared out any tree shavings, pound the tap into the tree with a hammer until it is secure. You may see some sap dripping from the hole immediately.
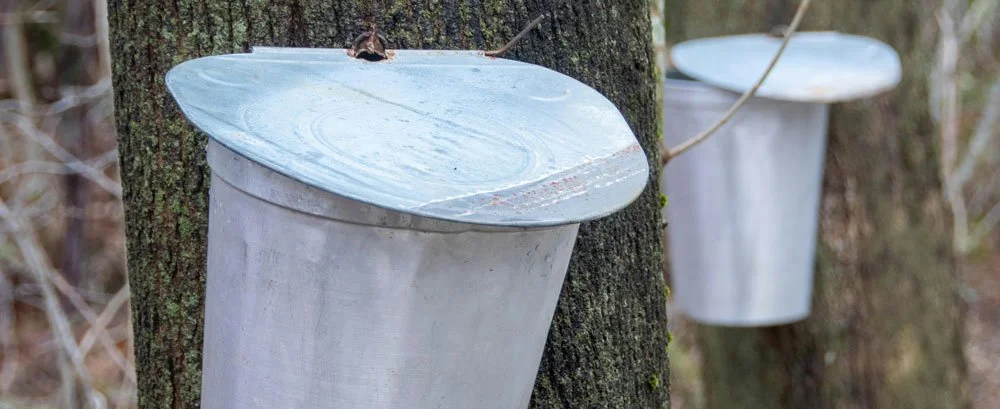
Photo by Beth Fitzpatrick
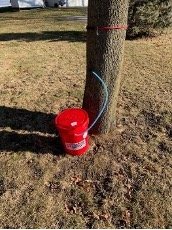
You can then attach tubing to a bucket beneath the tap or attach a bag to capture the sap. Keep a lid on your bucket to keep leaves and other debris from getting into the sap.
I check and empty my containers once a day. I combine the sap from any/all trees that I tap…though I am not sure if others keep the sap from various trees separated. The flavor may be different!?
Boiling and Filtering Maple Sap
After collecting the sap, it must be boiled down to evaporate the high-water content and concentrate the maple sugars. This process takes multiple hours, requiring careful monitoring and the removal of contaminants.
There are various methods for boiling sap. Many collect the sap and create an outdoor fire with a large pot. My neighbor uses this method and allegedly goes out around 3am to start the fire and finishes the process about 6pm! I, on the other hand, use a Turkey Fryer (and multiple propane tanks) to boil each day’s collection. I find this easier, as I do not have a way of storing multiple day’s sap, nor do I have a large fire pit and pot. I check the progress every couple of hours, and more frequently as the water evaporates, the sugar concentration increases, and the desired temperature for maple syrup is reached.
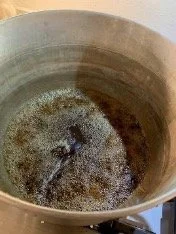
Most resources suggest a temperature of 219 Fahrenheit. Others suggest purchasing a syrup Hydrometer to confirm a density of 66-67% sugar. Allowing the temperature to exceed 219 Fahrenheit or the density to exceed 66-67% could result in crystallization (rock candy) of the sugar. This may be salvageable, as long as the syrup is not completely burned.
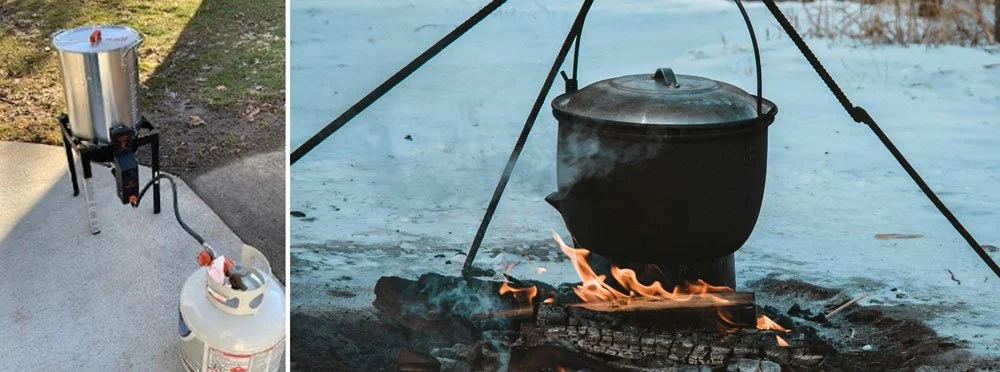
Pot & Campfire: Photo by Vadim Artyukhin on Unsplash
I have seen some crystals in the bottom of my jars following the process and attributed it to possibly exceeding the temperature, as it goes quickly at the end!
Once the desired temperature/density is reached, the literature seems split between pouring immediately through a filtration filter and into canning jars vs. allowing it to cool and then filtering to ensure that any contaminants are removed. Filtering while hot tends to be easier because the syrup flows more freely.
I generally move the process to my kitchen near the end so the monitoring of temperature/density can take place every few minutes.
A word of warning (from experience)…the process goes quickly at the end. Once the desired temperature or density is reached or nearly reached, the sap can begin to foam! I ruined my stove burner the first year as it boiled over and once cooled, did not come off!
I have tried a few types of filters…all purchased at local hardware stores that carry maple syrup supplies.
The Final Product!
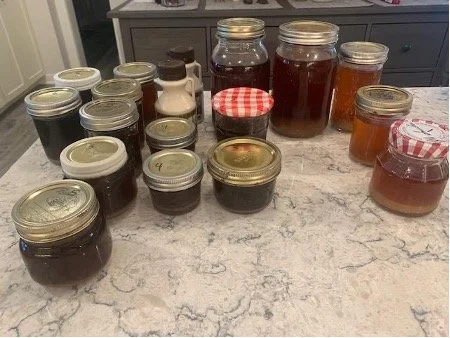
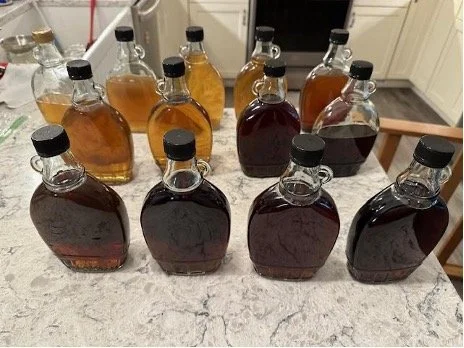
I am told that the color from my early in the year taps is lighter than the later season taps due to the concentration of the sap. Regardless, they all tasted GREAT!
I believe our very own Camp Edwards taps up to 90 trees each year! They have an elaborate set up for boiling the sap, which is worth checking out. Their annual pancake breakfast (generally in early April) is open to the public and highlights some of their syrup. Watch for a sign on Army Lake Road with the date!